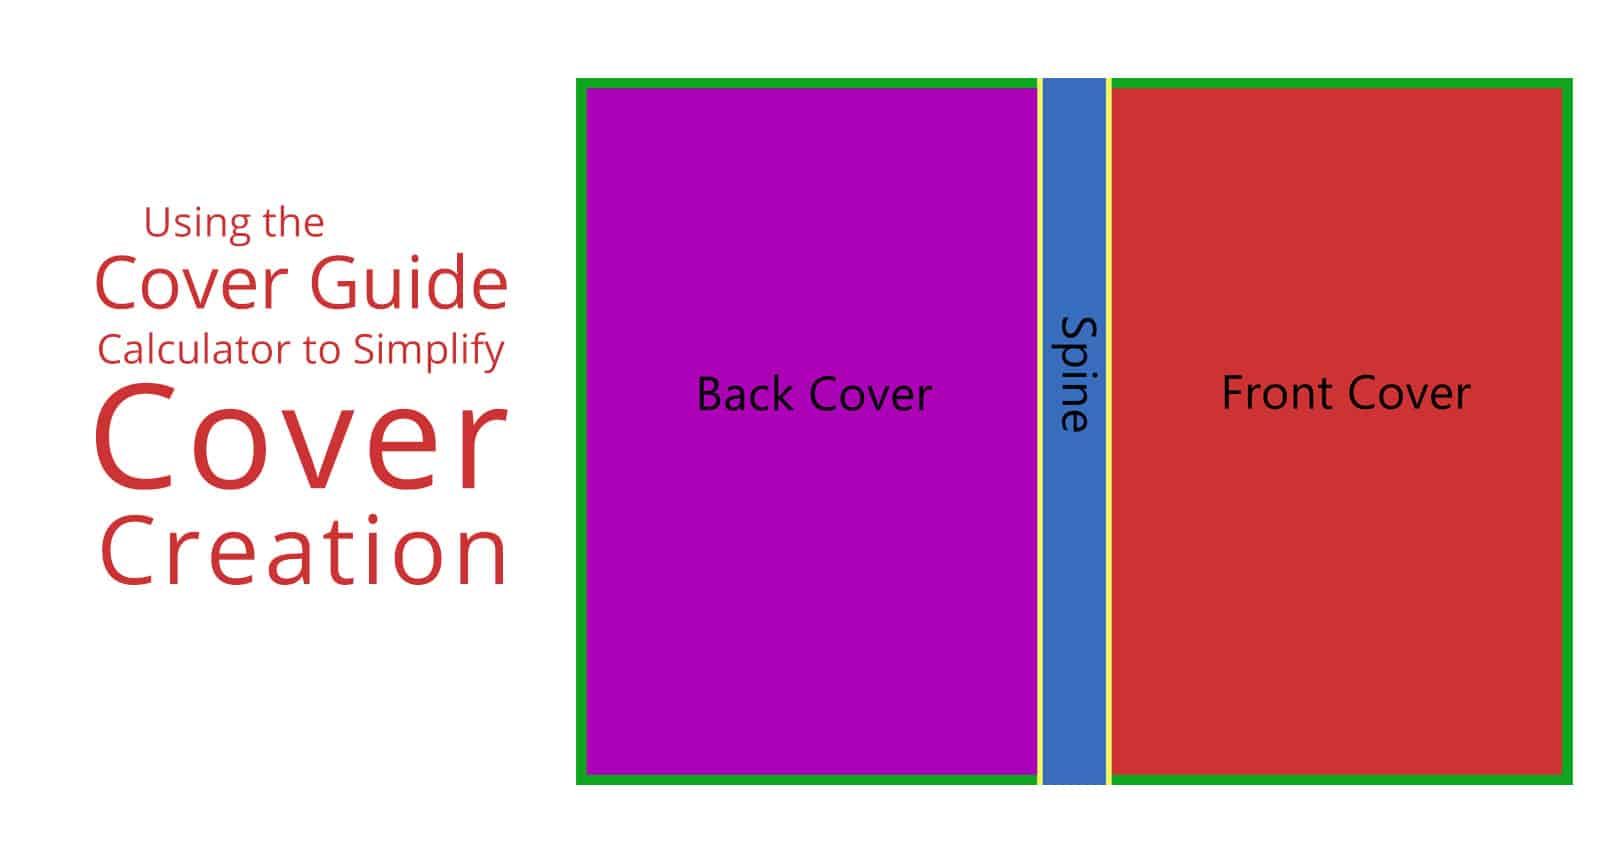
Are you interested in cover creation but not sure what to make the dimensions or where to put guides for the covers and spine? Instead of using a cover template, you can try out our easy cover calculator.
Please note that these instructions are helpful for creating a cover in Photoshop and other graphic programs. If you are using a page layout program like InDesign, instead of creating one large page for your cover spread, you would use the document bleed settings for your bleed and then create three separate pages for your cover (back, spine, and front), lining them up into one spread, adjusting their widths as needed.
Here are some easy steps to using the cover calculator.
Decide on Your Cover Size
Common cover sizes are 9 x 6, 8.5 x 5.5, and 8 x 5. The size of your cover affects the total number of pages your book will have, so keep that in mind when making your decision. The larger the cover, the more words you can fit on a page.
Fill Out the Calculator
Enter in your chosen width and size of your cover in the cover calculator.
Then put in how many pages your book has; this will be part of the calculation for the spine width of your cover. If you’re starting on cover creation before having the book typeset, you won’t know the number of pages, so just take a guess. There are approximately 390 words on an 8.5 x 5.5 page. Although it is a bit of a pain, you can go back and adjust this number and the width of your spine later. It is better to make the cover slightly wider than necessary as trimming is generally easier than adding elements once a cover is completed.
The page width default on our calculator is the width of pages for books printed by Amazon KDP. If you are using a different printer, check with them to find out what page width they use.
You do not need to adjust the spine width margin (determines how close your text can come to the edges of the spine) or the bleed (determines how far your image extends off the page, to ensure your cover has no white edges when it is cut). A bleed of .125 inches is the industry standard. Do not lower this number.
Cover Creation Using the Results
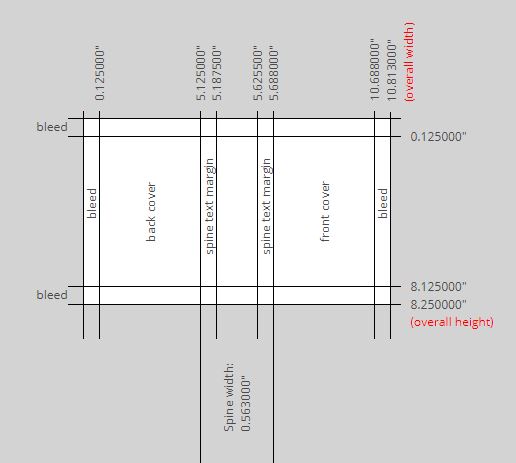
After you hit “Submit,” your results will show in an image below the Submit button. The total width and height are shown in red on the right sides.

Cover guide calculator output when using the defaults
Next, create a page with this total width and height, and place the guides at the locations specified.
In Photoshop, you can go up to View —> New Guide, choose vertical or horizontal, depending on what guide you are putting in, then put in the specific measurements that the calculator gives you. In the end, you’ll have 8 guides (6 vertical, 2 horizontal).
Adjusting the Spine
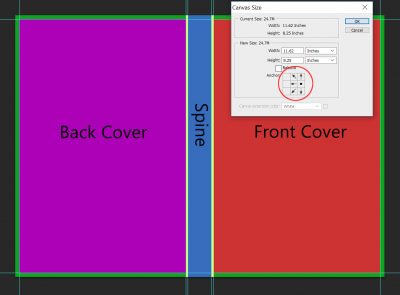
But let’s say you already designed the cover and need to adjust the spine. No problem! Put your numbers into the cover creation calculator. Then, go to Image —> Canvas Size in Photoshop to adjust the width of your cover to account for the new spine. Make sure to click the middle right anchor so your front cover elements will not need to be readjusted. Once clicked, the anchor in Photoshop should look like ours circled in the image below.

You’ll then need to adjust the location of the three vertical guides on the left side. Remove them by dragging them off the canvas and set guides with the new dimensions. Then adjust the content of your spine and back cover to make sure they’re where they need to be. You can highlight multiple layers (control click) or group layers to make readjusting easier.
In InDesign, you would only need to adjust the width of the middle page. No other movement would be needed because each part of the cover is its own page. Unfortunately, with InDesign, you can’t edit your photo right there and put cool effects on it. So it is a give and take.
Good luck with your cover creation!
What experiences have you had with cover creation? Let us know if you have any questions in the comments below.


Comments